One of the most common concerns our Mastery Program students have when they first begin the oil & drawing section is in regards to the potential toxicity of oil paint. There is a huge misconception that oil paints are toxic, and with the rise in chronic health issues, many artists avoid oil painting altogether.
Learn the techniques, tools, and non-toxic practices that will help you fall in love with oil painting.
Join Oil Painting Made Easy today and start building a strong, healthy foundation in one of the most timeless mediums in art.
While we've busted that myth here, let's talk about walnut oil. By exploring natural pigments or learning to make handmade oil paints, you may come across interesting alternatives to traditional materials. For example, walnut oil is a lesser-known option that offers unique advantages. It tends to yellow less over time compared to linseed oil, which makes it a desirable binder for oil paint. It also has natural cleaning properties, providing a non-toxic and effective way to clean paintbrushes without using harsh chemicals.
There is a slightly different process for using walnut oil that you'll need to be aware of before swapping out your solvent or turpentine. So let's walk through the steps together. Before you go throwing out your solvent, there are some things you need to know…

Step 1 - You'll need TWO jars
While artists typically use one jar of solvent to clean their brushes as they paint, you'll want to use two jars for walnut oil.
That second jar is incredibly helpful and an absolute must for clean, non-muddy colors. You'll want one jar or container to be your “dirty” walnut oil. This is, in essence, what your solvent jar used to be. It's important to use a container that fits all the bristles of the brush into the oil.
The second jar is much more straightforward. This will be your “clean” walnut oil. It doesn't have to be big or even have that much oil in it. As long as there's just enough walnut oil to swish the bristles of your brush in, that's enough.
Step 2 - Get the paint out
So you've planted that perfect brushstroke, and now you're ready to switch colors. You'll want to keep a spot to rub out excess paint before sticking it into the walnut oil. Whether that be a spare canvas board you keep near you while you paint, or cotton rag, you'll want something you can use to get as much paint out of your paintbrush as possible.
Once you've used up the paint in the brush, it's time to dip it into the walnut oil. However, this is important: While walnut oil is effective as cleaning paintbrushes, it also works a bit slower than solvent or other toxic thinners. With this in mind, we highly recommend letting the brush sit in the oil for about a minute before beginning the dabbing-and-tapping process of getting paint out of the brush. That probably sounds awful - waiting a whole minute - but that brief minute of patience will save you a lot of frustration and “re-dips.” It will allow you to clean the brush well in the first round of dabbing and tapping, rather than feeling like you have to repeat the dabbing process repeatedly to get the brush clean.
Simply dab and tap the bristles against the bottom of the jar, run the brush against the side of the jar to get the excess oil out, and then wipe well with a clean cotton rag (just as you would with solvent).
Step 3 - Give it a rinse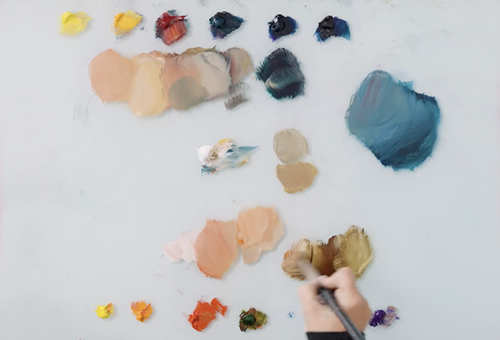
Now that the paint is out of the brush, you'll want to give it a quick dab-and-swish rinse in the clean walnut oil.
This will verify to you that there isn't any paint left in the brush, while also ensuring that the oil in the damp brush is clean and won't muddy your colors. DO NOT SKIP THIS STEP. Otherwise, your paint colors suffered. Your paintings will thank you for it.
Step 4 - Know these last tips
If you've followed the steps above, you're pretty much set to go. But there are a couple of things to keep in mind as you venture forth into the world of walnut oil.
- First, walnut oil can be drying if you leave your brushes in it too long (no longer than a week). Many walnut-oil-using artists will keep the tips of their brushes in walnut oil in between painting sessions. This is not a necessary step, but there are some benefits to it. Just know that if you choose to utilize this technique, you don't want to leave your brushes in walnut oil for longer than a week, or it can be drying to the bristles.
- Second, there is a difference between walnut oil and walnut alkyd. Walnut oil is just that — walnut oil. It is used as a binder for oil paints and can be used for cleaning brushes. So think about that… if it's what oil paint is made with, and oil paint can take weeks to dry, that means walnut oil will drastically slow down the drying time of your paint. DO NOT USE WALNUT OIL AS A MEDIUM when painting, unless you intend for the drying time to be much, much longer.
Walnut alkyd, on the other hand, is a walnut oil-based medium that is used the way most mediums are used — to hasten the dry time. If you'd like to get the benefits of walnut oil but also have your oil paints dry quicker, then walnut alkyd is a great medium to try.
Now you try!
Ready to dive deeper into oil painting with confidence?
If you’ve been curious about oil paint but hesitant because of health concerns or confusion about materials, Oil Painting Made Easy is the perfect next step. This self-paced course walks you through everything you need to know to start painting boldly and safely — from supplies and setup to brushwork and layering.
Learn the techniques, tools, and non-toxic practices that will help you fall in love with oil painting.
Join Oil Painting Made Easy today and start building a strong, healthy foundation in one of the most timeless mediums in art.
Explore the course here and take your first confident steps as an oil painter.
Learn to use Elli's warm and cool oil painting system...