An artist’s paint brushes are the conduits between their hearts and their canvases. If you’re an artist, then you know, they are an incredibly important tool that you’ll always want to have in tip top shape. If they’re frayed or stiff, you’ll only end up fighting with them in order to produce your desired effect.
In the end, brushes that aren’t in good shape ultimately even have the potential to affect which paint brushes you choose. If a brush is in bad shape, it’s not likely that you’ll use it, even if it happens to be one of your favorite brushes.
Proper brush care is an imperative habit to foster as an artist. Excellence as an artist often starts with excellent art supplies and tools. It’s important that you take the time to take care of your art tools right after using them. Art mastery isn’t an end product. It’s a way of being.
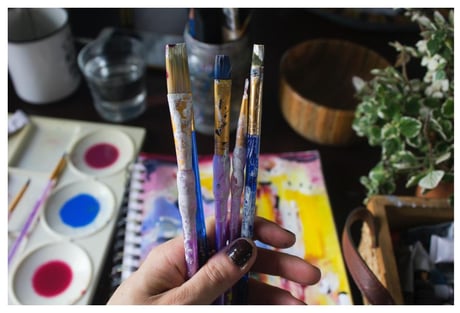
Photo caption: Learning how to clean your paint brushes is an important step in the art process. Photo courtesy of Deeana Creates on Pexels.
How to Clean Your Artist’s Brushes
Luckily, it is super simple and easy to clean your brushes. Here are some tips to keep these special tools maintained! Here is how to clean art paint brushes in three easy steps.
1 - Wipe Off the Excess Paint

As soon as you are finished with your productive and invigorating paint session, it’s time to give some TLC to the tools that helped you create your vision.
Be sure to wipe off the excess paint and thinner on the side of your jar; you want to save as much thinner as possible because this can be used and recycled later.
Do not dump your thinner down the sink.
2 - Find Some Dish Soap
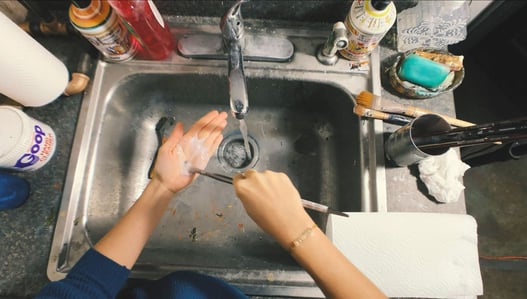
Regular dish soap works perfectly well to clean your brushes, and you can either squeeze the soap on the palm of your hand or on the bristles of the brush to start cleaning.
Using gentle, circular motions, swirl the brush in your palm, and rinse and repeat until the brush is thoroughly washed. Gently reshape the bristles and lay your brushes down flat to dry.
3 - Create Your Sludge Jar
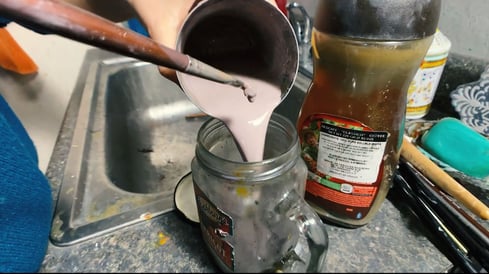
Once you’ve cleaned your brushes, leave one brush still in the paint jar to help clean out the cup. Now you can begin the process of recycling and storing your thinner.
With the brush still left in the jar, stir until the paint that is settled on the bottom lifts and mixes with the thinner. Next, pour the thinner in a jar we like to call the “sludge jar.”
Make sure your sludge jar has a lid, because you’ll want to let it sit for about three days to allow the paint to separate from the thinner. The thinner will then sit on top of the paint, and be perfectly clear and ready to use for your next painting session!
If you’d like to see step-by-step instructions on how to clean your brushes, then watch our tutorial below.
Final Thoughts on Cleaning Your Brushes
Many aspiring professional artists only think of the end product when they dream of an art career. However, most art-making is behind the scenes and requires hard work and discipline, including the discipline to take care of their art tools.
If it’s your deepest desire to gain mastery over your career, then it’s important that you understand the technical aspects of art as well as the more “artsy” aspects. This art tutorial is intended to help you achieve excellence at every step of your art process, including the clean-up portion of it.
🎨 Unleash Your Inner Artist!
Ready to turn your passion into a career? 🚀 Join the Mastery Program at Milan Art Institute and gain the skills, confidence, and mentorship to thrive as a professional artist. 🌟